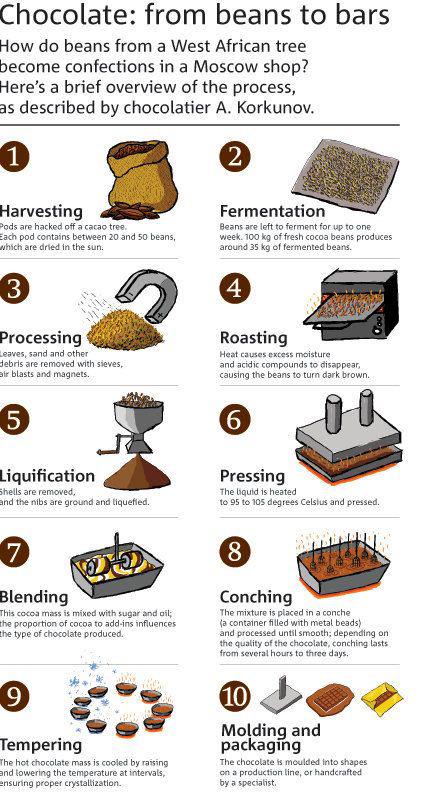

1. Harvesting
The journey of chocolate begins with the harvesting of cocoa pods, which house the valuable cocoa beans. Cocoa is primarily grown within 20 degrees north and south of the equator in humid, rainy environments. The two main varieties used for chocolate production are Forastero and Criollo. Cocoa pods grow directly from the trunk and branches of cocoa trees. They are oval-shaped and can range from 14 to 20 cm long. The pods start off green when unripe, then turn yellow and finally orange when ripe and ready for harvest. Timing is important, as pods are only ripe for 1 to 2 weeks. If left on the tree too long, they will start to rot and fermentation will begin inside the pod. The most common method of harvesting is to manually cut the ripe pods from the tree using a machete or long-handled harvesting knife. The pods grow high up on older trees, so harvesters often need to climb up ladders or the tree itself to reach them. Care must be taken not to damage nearby flowers or buds which will form the next crop. After cutting, the pods are split open using a wooden club or mallet. The wet cocoa beans are then scooped out and collected in baskets or buckets for the next stage – fermentation. Timing of the harvest is crucial, as each tree undergoes flowering and fruiting cycles at varying intervals based on genetics and environmental conditions. The ripe pods must be harvested at peak ripeness and rotated efficiently for premium quality cocoa.
2. Fermenting
After the cocoa pods are harvested, they are split open and the cocoa beans are removed. The beans and surrounding pulp are then piled into heaps or placed in wooden boxes for fermentation. Fermentation is a crucial step in developing the flavor of the beans. The pulp surrounds the beans, which causes them to heat up. As the temperature increases, the pulp liquefies and drains away while the beans begin to germinate. Complex chemical changes also occur during this process, especially reactions between the beans’ naturally occurring polyphenols and enzymes. Fermentation typically takes 5-7 days. The beans must be frequently turned and re-piled during this period so that the heat and chemical reactions occur evenly. Skilled workers test the beans for the right fermentation level by their color and smell. Once fermented, the beans are dried either by spreading them out in the sun or using artificial dryers. Drying reduces their moisture content from 60% to about 7.5%. This drying process can take several days up to 2 weeks, depending on the method. It helps to stabilize the beans, stop germination, and allow for safe storage and transportation. The fermenting and drying process is vital for producing high quality cocoa beans that can be further processed into delicious chocolate. Proper fermentation develops the precursor flavors while drying preserves them.
3. Cleaning & Roasting
After the cocoa beans have been fermented and dried, they go through a cleaning and sorting process to remove any extraneous material. This prepares them for roasting, which develops the characteristic chocolate flavors. The beans are first cleaned to remove any leftover pulp, shells, sticks, stones, or other foreign material. This is done through a combination of screening, air aspiration, and gravity methods. The beans may also be sorted by size or weight to ensure uniform roasting. Next, the beans undergo roasting. This is a crucial step, as roasting transforms the beans’ chemical and physical properties to develop the sought-after chocolatey flavors and aromas. The roasting process usually takes 15-120 minutes at temperatures between 250-310°F (120-154°C). During roasting, moisture content is reduced and the beans will darken in color. Their size will also increase up to twice the original volume as they become lighter and brittle. The high heat breaks down starch granules and causes caramelization of sugars and browning reactions. This produces over 400 different flavor compounds that give chocolate its rich, deep taste. The degree of roasting depends on the desired end product. Light roasts lead to more acidity and fruity, floral notes. Dark roasts result in richer, more bitter chocolate. The roaster’s skill comes from balancing time and temperature to achieve the perfect roast level. Stopping the roasting at just the right moment is essential for excellent chocolate flavor.
4. Winnowing
Winnowing is an important step in chocolate production that removes the husk from the cocoa beans after they have been roasted and cracked open. The process works by using air currents to blow away the lighter husk, leaving behind only the heavier cocoa nibs. The winnowing machine uses a fan or air compressor to generate a strong upward air current through a chamber containing the cracked cocoa beans. Because the husk is light and papery compared to the nibs, the powerful air flow lifts and separates the husk from the nibs. The husk then blows up and out through vents at the top of the machine. The nibs, being heavier, drop down through the air current and pass through the bottom of the chamber. Winnowing is typically done in two or more stages to thoroughly separate all traces of husk from the cocoa nibs. The nibs may be run through the winnowing machine several times to ensure maximum removal of husk. Some processors may also use sieves or screens to further eliminate any fine particles of husk not blown away by the air current. Proper winnowing is crucial, as any remaining husk can impart undesirable flavors during further processing. The end goal is to obtain 100% pure cocoa nibs that are free of any residues from the bean husk. This allows the full chocolate flavor and aroma to develop during subsequent steps as the nibs are ground into chocolate liquor, blended, and conched. The winnowing process thus sets the stage for producing chocolate with the proper taste, texture, and quality that consumers expect.
5. Grinding
The roasted cocoa beans are ground into small particles to produce cocoa liquor (cocoa particles suspended in cocoa butter). The grinding process is important for determining the texture and mouthfeel of the final chocolate product. Industrial grinders called melangeurs are used to grind the beans. The beans are crushed between two granite rollers that apply high pressure to break the particles down to the desired size. The fineness of the ground particles, known as the particle size, determines the smoothness of the chocolate.
6. Adding Cocoa Butter
One of the most important steps in chocolate making is pressing the cocoa butter from the cocoa beans. The beans naturally contain cocoa solids and cocoa butter, but they must be separated. Cocoa presses are used to extract the fatty cocoa butter from the powdery solid cocoa mass. Hydraulic presses can apply up to 6000 pounds of pressure to squeeze out the butter. Cocoa butter is the natural fat that gives chocolate its smooth, melting texture. The percentage of cocoa butter compared to cocoa solids is what determines the type of chocolate. Milk chocolate generally contains around 30% cocoa butter. Dark chocolate contains a higher percentage of cocoa butter, from 35% up to 99% in ultra-dark varieties. White chocolate contains cocoa butter but no cocoa solids. The extracted cocoa butter is usually refined and deodorized before being blended back with cocoa solids. Adjusting the ratio of solids to butter is how chocolate makers develop the texture and qualities of the final chocolate. More cocoa butter results in a smoother, meltier chocolate.
7. Blending & Conching
The blended cocoa liquor is intensely bitter and acidic on its own. To develop the flavor we know and love in chocolate, the nibs must be blended with cocoa butter, sugar, and other ingredients like milk or nuts. This blending process thoroughly incorporates all the ingredients together into a smooth, homogenous mass. Powerful motors drive heavy rollers that grind and shear the chocolate mixture for hours or even days in a process known as conching. The conching time can last anywhere from a few hours to three days depending on the type and quality of the chocolate. Better chocolates conche for much longer to develop deeper, more complex flavors.
8. Tempering
Tempering is one of the most important steps in chocolate making. It involves heating and cooling the chocolate in precise ways to form stable crystal structures in the cocoa butter. Properly tempered chocolate has a smooth, glossy appearance and a satisfying “snap” when broken. The aim is to end up with only the stable Form V crystals remaining in the chocolate. This provides the ideal texture and melting properties in the finished chocolate. Properly tempered chocolate resists bloom, has a satisfying snap, melts smoothly on the tongue, and has a glossy appearance.
9. Molding & Cooling
The next critical step is molding and cooling the chocolate. The tempered chocolate is carefully poured into molds of various shapes and sizes, like small candies, bars, or large hollow figures. As the chocolate fills the molds, it is gently tapped on the sides to release any air bubbles that may have formed while pouring. This helps ensure the final products have a perfectly smooth surface with no holes from trapped air. The filled molds then undergo controlled cooling. Most commonly, the molds are placed on vibrating tables that gently shake them as they cool. This prevents fat bloom, a whitish coating that occurs from poor crystallization. Cooling times range from 10 minutes to several hours depending on the size and thickness of the mold. Once fully set and hardened, the chocolates are finally ready to be removed from the molds and packaged.
10. Packaging & Storage
After the chocolate has been molded and cooled, it is ready for packaging. Proper packaging and storage are important to maintain chocolate’s flavor and texture qualities. Chocolate is very sensitive to external odors and flavors. It also readily absorbs heat. For these reasons, chocolate must be well protected from outside influences during storage.